


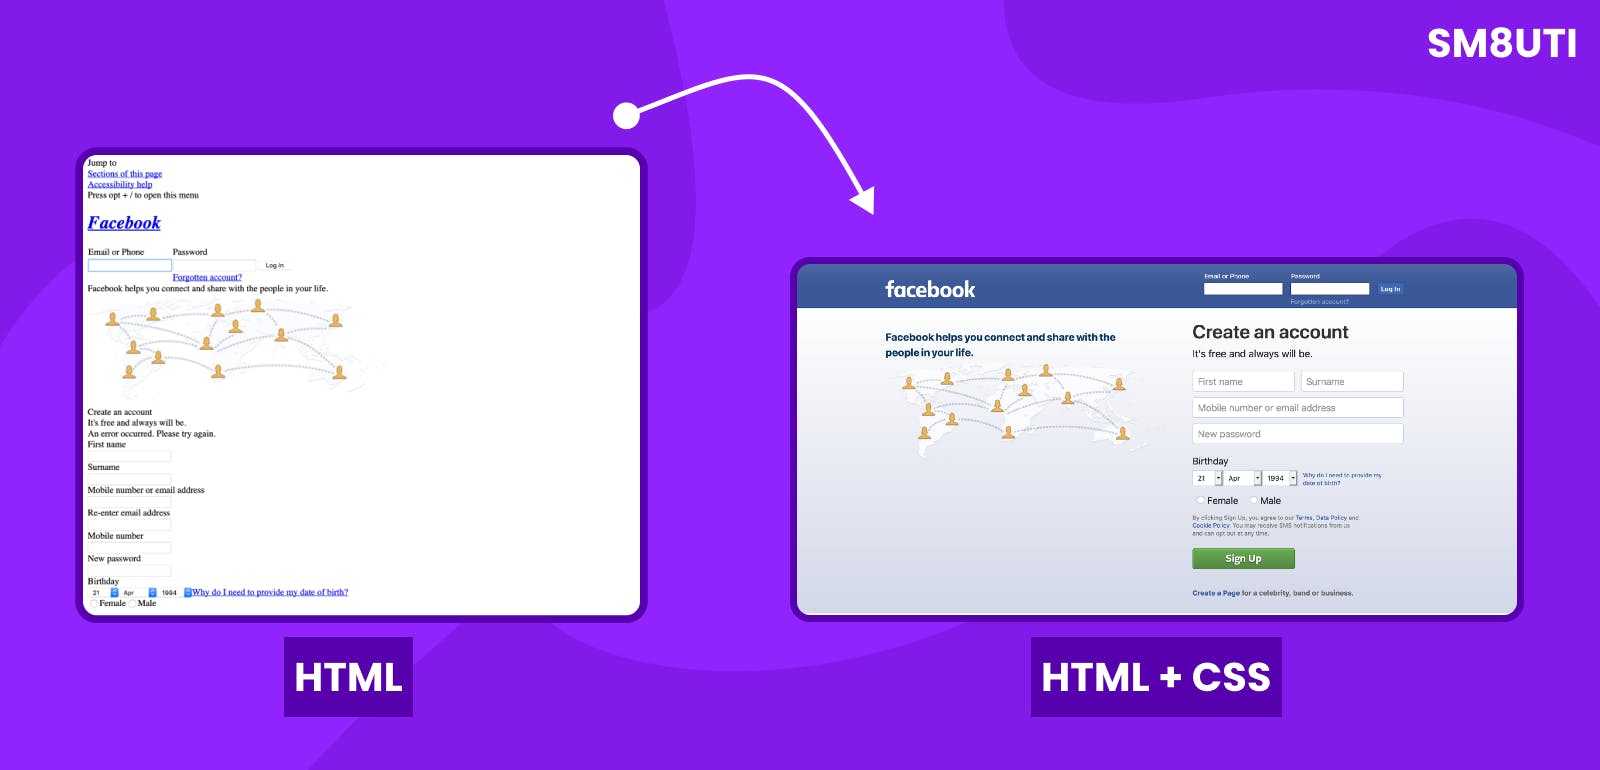
In the front-end development journey the 3 things that are important. HTML, CSS, and javascript. in this article, we will cover the basics of CSS and how it works on a web page, and why it is an important thing in a website.
What is CSS?
CSS: Cascading Style Sheets
CSS is a language for styling a website and it helps to change the appearance of the website and made stunning looks for a web page. Frankly saying that the CSS is only used for targeting elements or tags and changing the look of a website or webpage.
CSS is a style sheet language that is used to describe the look and formatting of a document written in a markup language. It provides an additional feature to HTML. It is generally used with HTML to change the style of web pages and user interfaces. It can also be used with any kind of XML document including plain XML, SVG, and XUL. ( Source : Javapoint )
How CSS works?
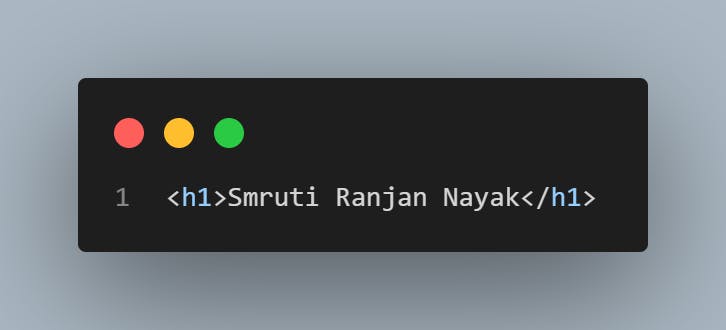
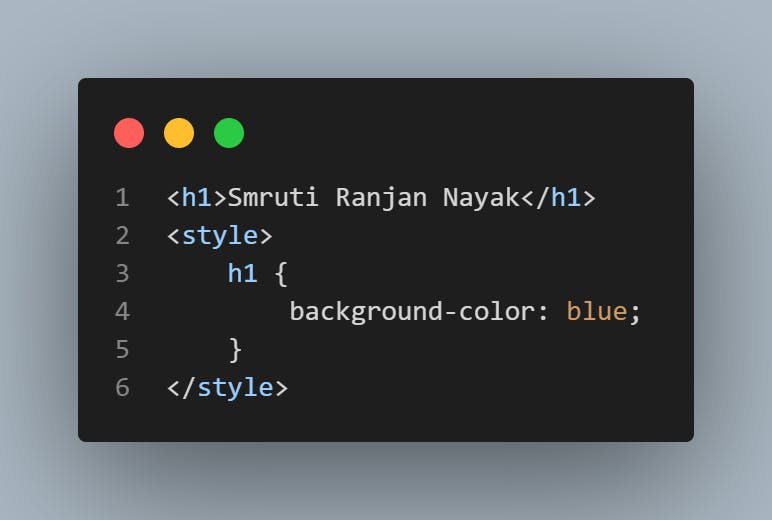
The better way you understand how it works, I will give you an example :
First, we create an HTML file and open the file in VS Code, you will use different IDE like Sublime Text, Atom, etc. then we write an element in a file, select the element using CSS and change some appearance like background color, etc.
Output :

Using CSS :
Output :

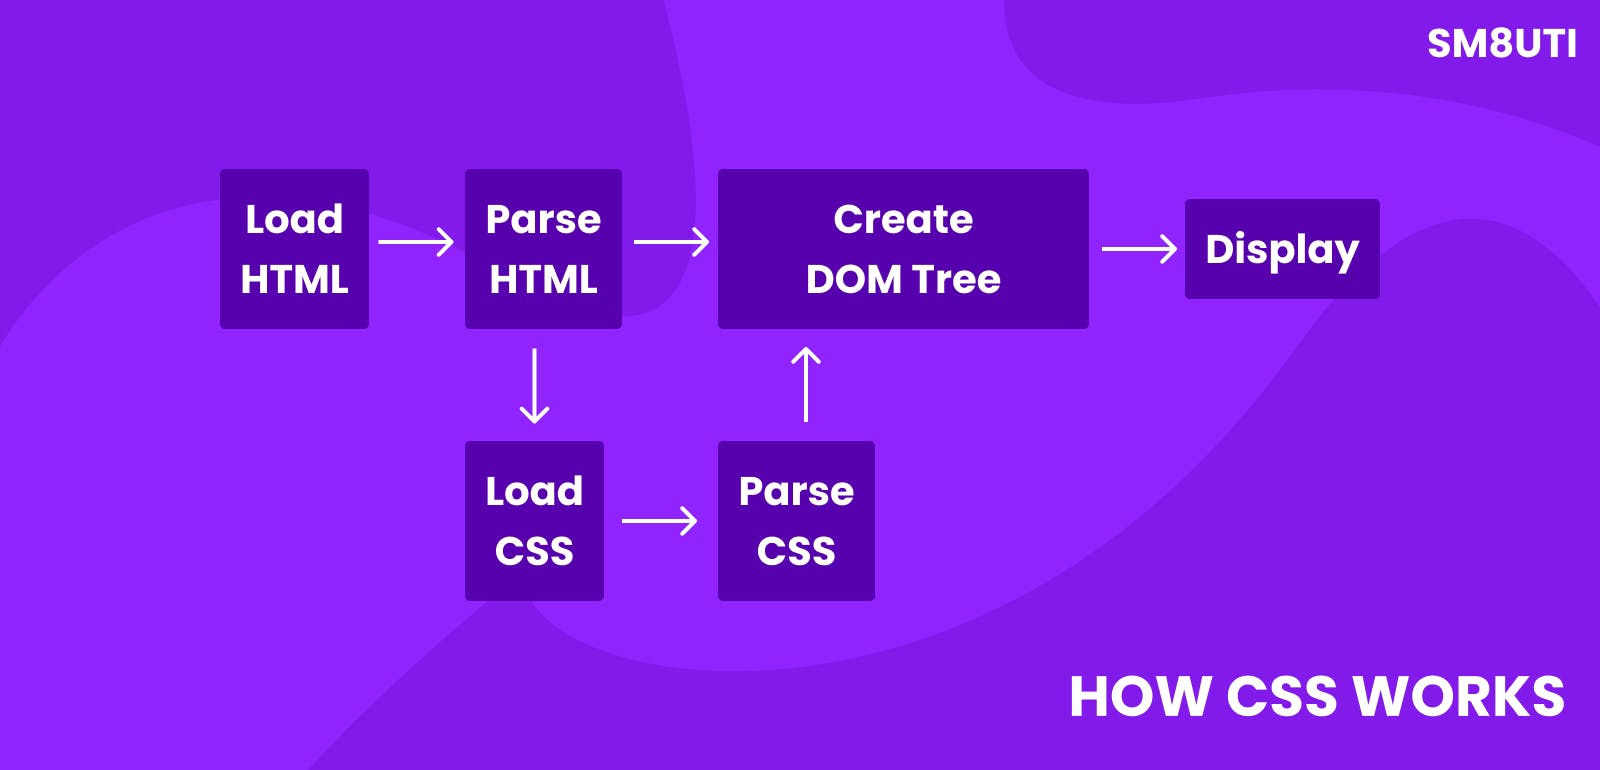
Once you have loaded and parsed the HTML content and CSS styling. First, the web browser converts them into the DOM ( Document Object Model ).once the DOM combines the content and style of the web document and is a representation of the web document within the memory of the computer, the browser will display the content.
we can add the CSS file in 3 different ways:
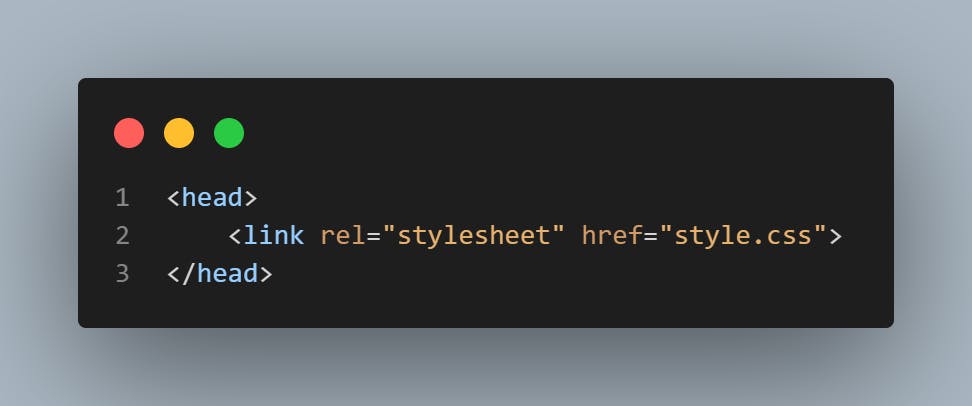
External CSS file :
In the External CSS file, we can create a CSS file and then link the CSS file to an HTML file. this method we use in real-life projects or the programming world.
CSS File extension is
.css
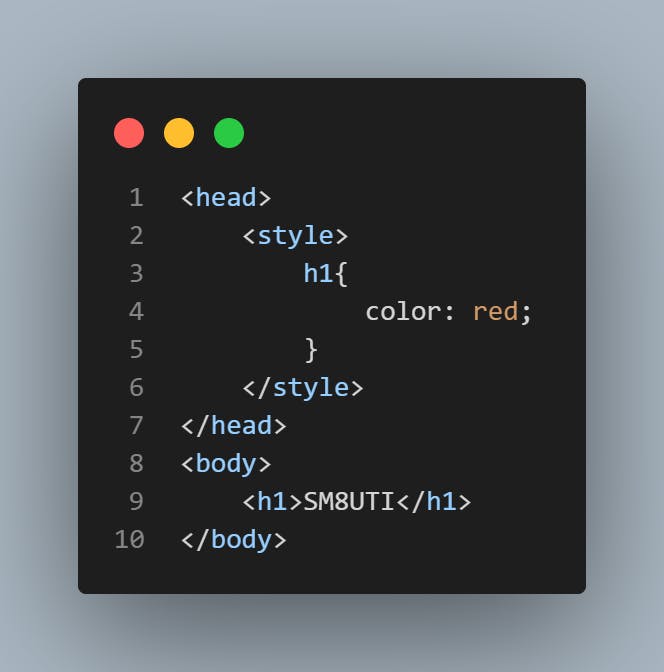
Internal CSS file :
In this method, we can write CSS code inside the HTML page or document using
<style>tag.
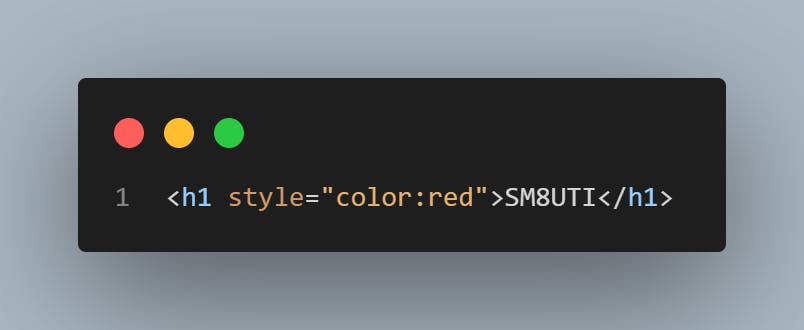
Inline Style :
In this method, we can write CSS rules or styles directly inside an HTML element using
styleattributes.
CSS Selector :
Selectors are just used to select elements or tags on the web page or web document. in the above example, we select the h1 tag and use some styling.
h1{
  background-color:blue;
}
Here h1 is the Element selector.
In CSS, We use different CSS selectors they are :
Universal Selector :
This selector is used for styling all the elements present in an HTML Document.
* is a Universal Selector.
CSS universal selectors select any type of element in an HTML page.
*{
  color: blue;
}
Example :
<!DOCTYPE html>
<html lang="en">
<head>
    <meta charset="UTF-8">
    <meta http-equiv="X-UA-Compatible" content="IE=edge">
    <meta name="viewport" content="width=device-width, initial-scale=1.0">
    <title>Iwritecode</title>
    <style>
             *{
                  background-color: blueviolet;
              }
    </style>
</head>
<body>
    <h1>Hello Smruti Ranjan Nayak,</h1>
    <p>Lorem ipsum dolor, sit amet consectetur adipisicing elit. Dignissimos eligendi ratione odit similique nostrum maiores dolor quas! Ipsum reiciendis soluta assumenda nesciunt dolores maiores amet pariatur ullam, culpa et odit molestiae aliquam! Molestiae optio voluptates quo? Nemo fugiat repellat eos vel necessitatibus, sequi, unde eligendi praesentium id officiis quam saepe?</p>
    <h2>I am a</h2>
    <ul>
        <li>Lorem, ipsum.</li>
        <li>Lorem ipsum dolor sit.</li>
        <li>Lorem, ipsum dolor.</li>
        <li>Lorem, ipsum.</li>
    </ul>
</body>
</html>
Before CSS :
After CSS :

Individual or Element selector :
In this selector, we select a specific element on a web page that we want to style.
in an HTML file, we select only the h1 tag and if we change the color from black to green then inside a web page all h1 tags changed color from black to green.
Example :
<!DOCTYPE html>
<html lang="en">
<head>
    <meta charset="UTF-8">
    <meta http-equiv="X-UA-Compatible" content="IE=edge">
    <meta name="viewport" content="width=device-width, initial-scale=1.0">
    <title>Iwritecode</title>
    <style>
        h1{
            background-color: blueviolet;
        }
    </style>
</head>
<body>
    <h1>Hello Smruti Ranjan Nayak,</h1>
    <p>Lorem ipsum dolor, sit amet consectetur adipisicing elit. Dignissimos eligendi ratione odit similique nostrum maiores dolor quas! Ipsum reiciendis soluta assumenda nesciunt dolores maiores amet pariatur ullam, culpa et odit molestiae aliquam! Molestiae optio voluptates quo? Nemo fugiat repellat eos vel necessitatibus, sequi, unde eligendi praesentium id officiis quam saepe?</p>
    <h2>I am a</h2>
    <ul>
        <li>Lorem, ipsum.</li>
        <li>Lorem ipsum dolor sit.</li>
        <li>Lorem, ipsum dolor.</li>
        <li>Lorem, ipsum.</li>
    </ul>
    <h1>I am from,</h1>
    <p>Lorem ipsum dolor, sit amet consectetur adipisicing elit. Dignissimos eligendi ratione odit similique nostrum maiores dolor quas! Ipsum reiciendis soluta assumenda nesciunt dolores maiores amet pariatur ullam, culpa et odit molestiae aliquam! Molestiae optio voluptates quo? Nemo fugiat repellat eos vel necessitatibus, sequi, unde eligendi praesentium id officiis quam saepe?</p>
</body>
</body>
</html>
Output :
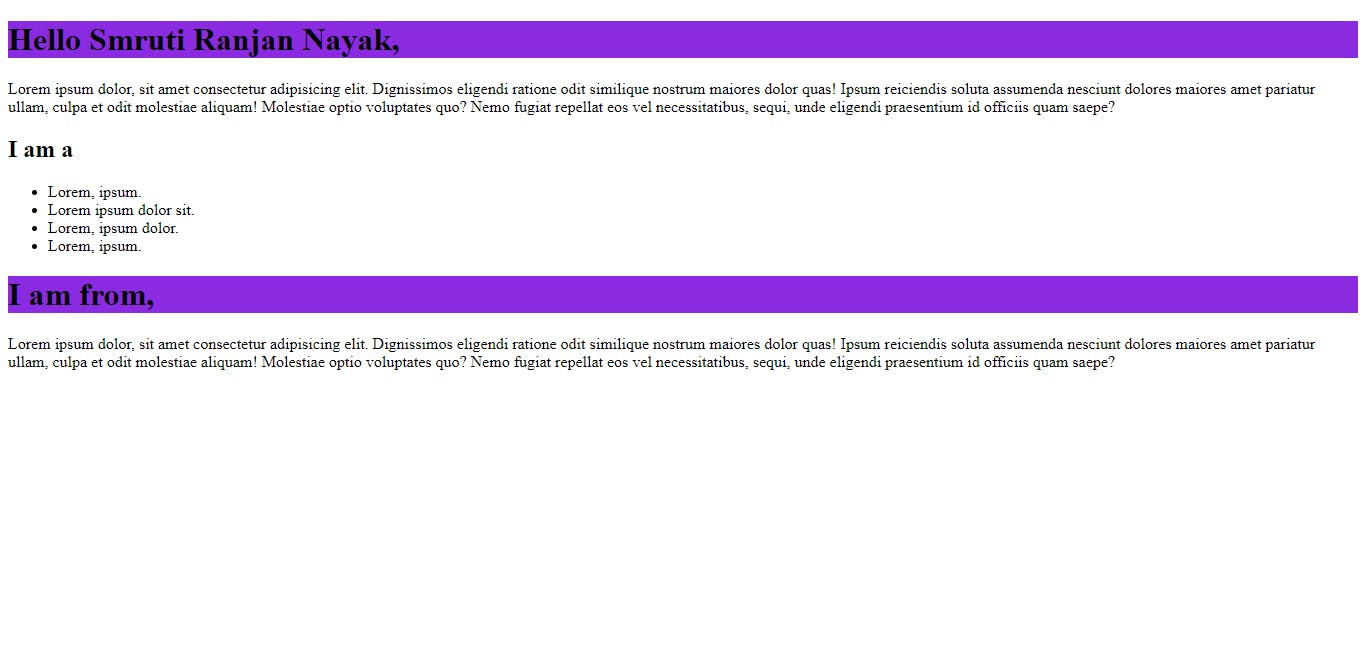
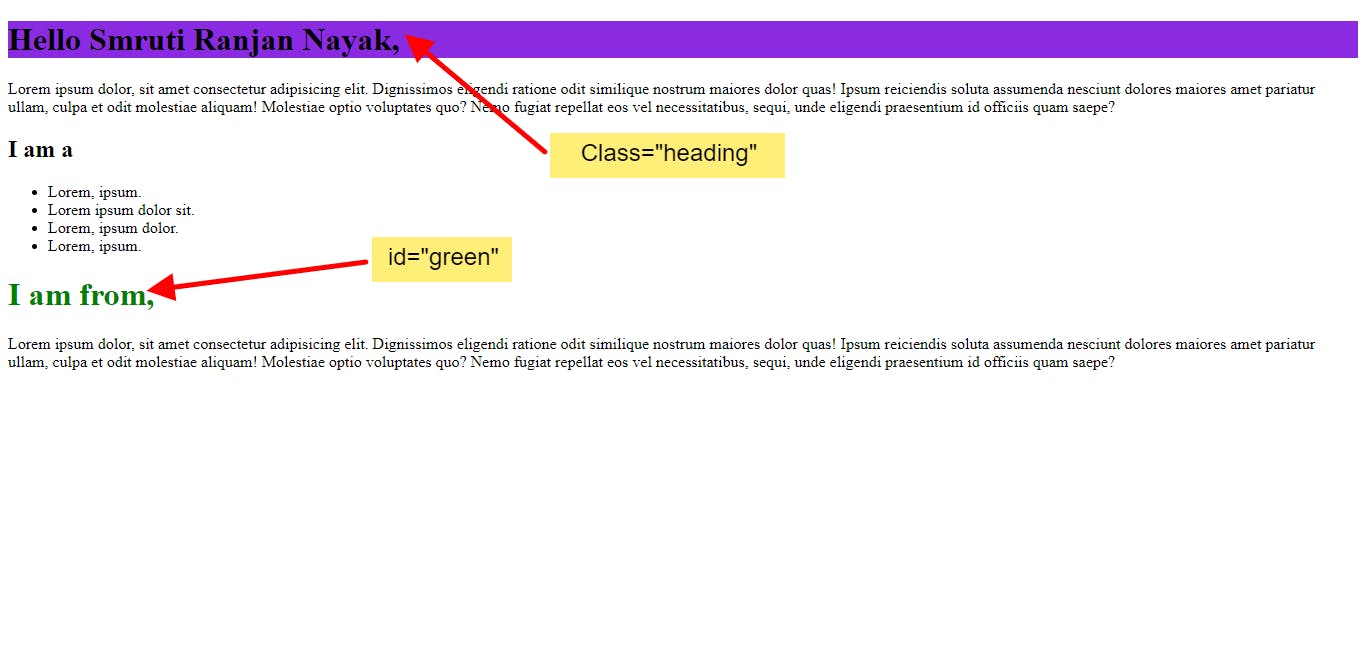
Class and ID selector :
These selectors are used to select the content we want to style.ID and Class both are CSS element selectors and are used to identify an element based on its assigned name. CSS id and class selectors are the most used selectors in CSS.
We can apply a class to various elements so that it could be numerous times on a single page. The class is assigned to an element and its name starts with
.followed by the name of the class.The Id is unique on a page, and we can only apply it to one specific element. The name of the Id starts with the
#symbol followed by a unique id name.
#idName{
  color:blue;
}

.className{
  color:green;
}
Example :
<!DOCTYPE html>
<html lang="en">

<head>
    <meta charset="UTF-8">
    <meta http-equiv="X-UA-Compatible" content="IE=edge">
    <meta name="viewport" content="width=device-width, initial-scale=1.0">
    <title>Iwritecode</title>
    <style>
        .heading {
            background-color: blueviolet;
        }

        #green {
            color: green;
        }
    </style>
</head>

<body>
    <h1 class="heading">Hello Smruti Ranjan Nayak,</h1>
    <p>Lorem ipsum dolor, sit amet consectetur adipisicing elit. Dignissimos eligendi ratione odit similique nostrum
        maiores dolor quas! Ipsum reiciendis soluta assumenda nesciunt dolores maiores amet pariatur ullam, culpa et
        odit molestiae aliquam! Molestiae optio voluptates quo? Nemo fugiat repellat eos vel necessitatibus, sequi, unde
        eligendi praesentium id officiis quam saepe?</p>
    <h2>I am a</h2>
    <ul>
        <li>Lorem, ipsum.</li>
        <li>Lorem ipsum dolor sit.</li>
        <li>Lorem, ipsum dolor.</li>
        <li>Lorem, ipsum.</li>
    </ul>
    <h1 id="green">I am from,</h1>
    <p>Lorem ipsum dolor, sit amet consectetur adipisicing elit. Dignissimos eligendi ratione odit similique nostrum
        maiores dolor quas! Ipsum reiciendis soluta assumenda nesciunt dolores maiores amet pariatur ullam, culpa et
        odit molestiae aliquam! Molestiae optio voluptates quo? Nemo fugiat repellat eos vel necessitatibus, sequi, unde
        eligendi praesentium id officiis quam saepe?</p>
</body>
</body>

</html>
Output:
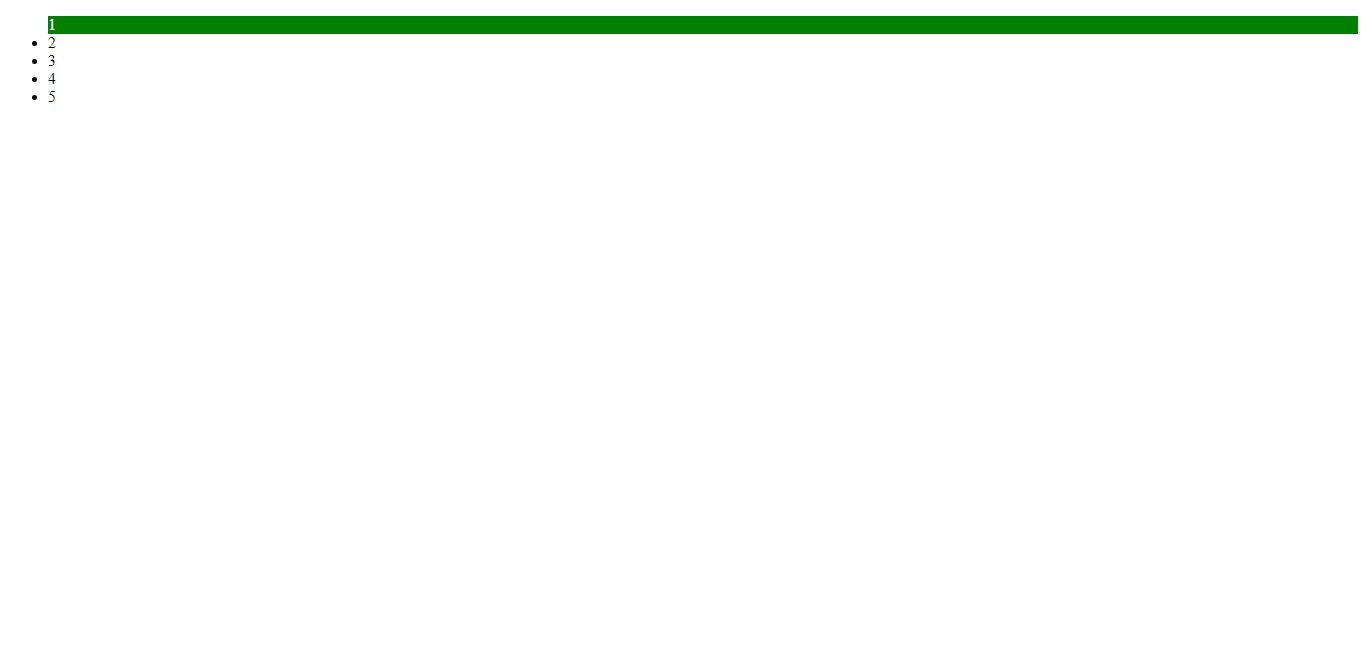
Chained Selector:
The chained selector is also defined as and selector. it is used when we want two or more conditions to be true then that situation the CSS styling is applied.
Syntax:
element.element{
  color:red;
}
Example :
<!DOCTYPE html>
<html lang="en">

<head>
    <meta charset="UTF-8">
    <meta http-equiv="X-UA-Compatible" content="IE=edge">
    <meta name="viewport" content="width=device-width, initial-scale=1.0">
    <title>CSS</title>
    <style>
        .green.white {
            background-color: green;
            color: white;
        }
    </style>
</head>

<body>
    <ul>
        <li class="green white">1</li>
        <li class="green">2</li>
        <li class="white">3</li>
        <li>4</li>
        <li>5</li>
    </ul>
</body>

</html>
Output :
Combined Selector :
in this selector, we use one styled-components to style different elements. For example, if I want to style h1 elements and h4 elements in one CSS component or code and change the color black to red I used a combined selector.
Syntax :
element,element{
  color:red;
}
<!DOCTYPE html>
<html lang="en">

<head>
    <meta charset="UTF-8">
    <meta http-equiv="X-UA-Compatible" content="IE=edge">
    <meta name="viewport" content="width=device-width, initial-scale=1.0">
    <title>CSS</title>
    <style>
        h1,
        h4 {
            color: red;
        }
    </style>
</head>

<body>
    <h1>Game</h1>
    <ul>
        <li>hello</li>
        <li>world</li>
        <h4>I am Smruti ranjan nayak</h4>
    </ul>
</body>

</html>
output:

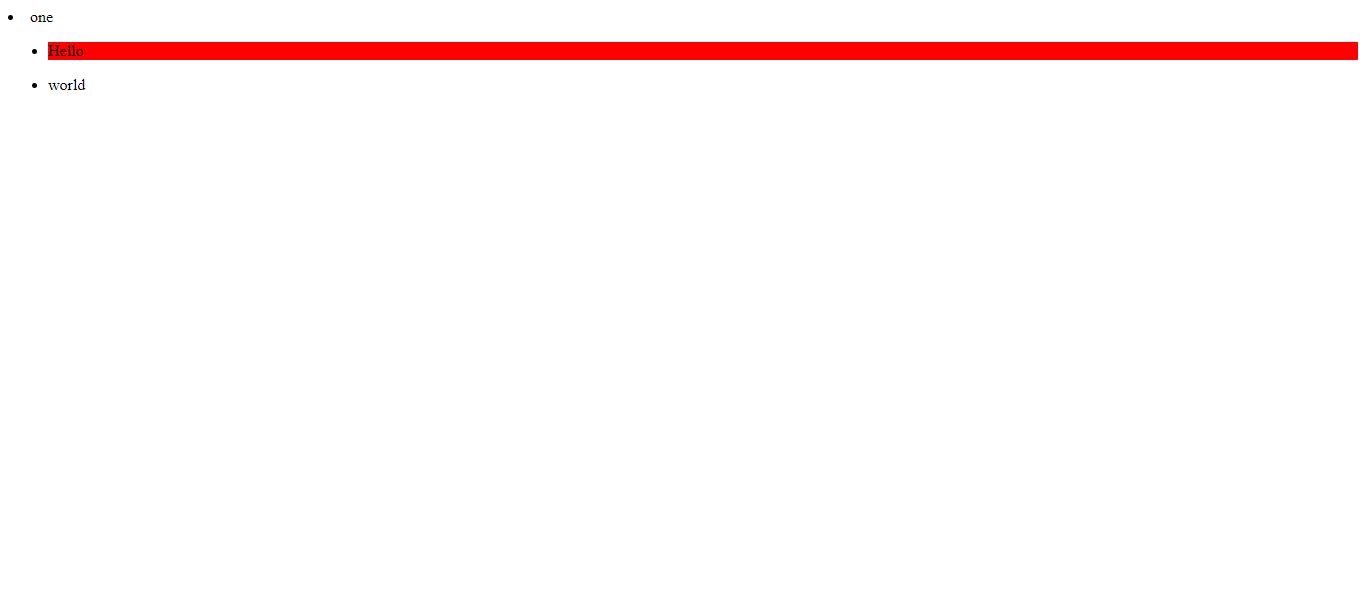
Inside an element selector :
When you select a child or sub-child that is present inside the parent or child then we will use an inside element selector. and it is many time used in real-life projects.
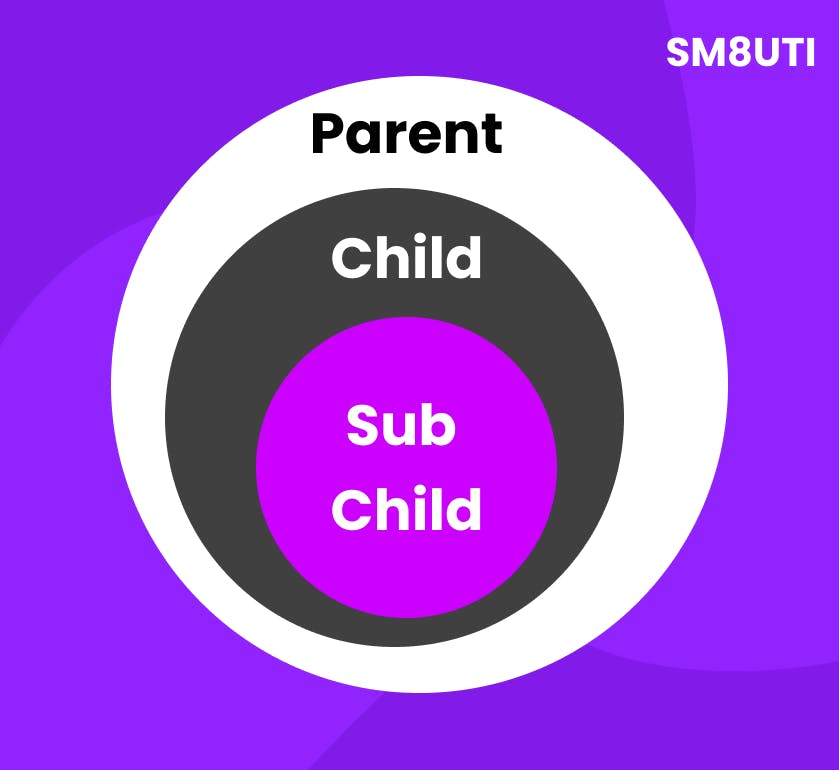
syntax :
element element element{
  color:red;
}
Example :
<!DOCTYPE html>
<html lang="en">

<head>
    <meta charset="UTF-8">
    <meta http-equiv="X-UA-Compatible" content="IE=edge">
    <meta name="viewport" content="width=device-width, initial-scale=1.0">
    <title>CSS</title>
    <style>
        h1,
        h4 {
            color: red;
        }
    </style>
</head>

<body>
    <li>
        one
    </li>
    <ul>
        <li>hello
        <li>one</li>
        </li>
        <li>world</li>
    </ul>
</body>

</html>
Output :
Thank you very much for reading. Sm8uti
#iwritecode #html #web #webserver